A special occasion calls for pulling out all the stops, especially when it comes to cakes and treats! If you haven’t yet stumbled across a gravity-defying cake on social media, prepare to have your mind blown…
This type of cake, also known as an anti-gravity cake, is typically finished with a packet of sweets pouring over the top and spilling down the sides. It’s an impressive sight; there’s a reason why this showstopping bake has taken social media by an (icing sugar) storm!
Whether you’re looking to get creative and deliver a bold cake for a big birthday or Christmas celebration, or to simply share with friends over a well-needed catch-up alongside mugs of hot tea, here’s how you can do exactly that.
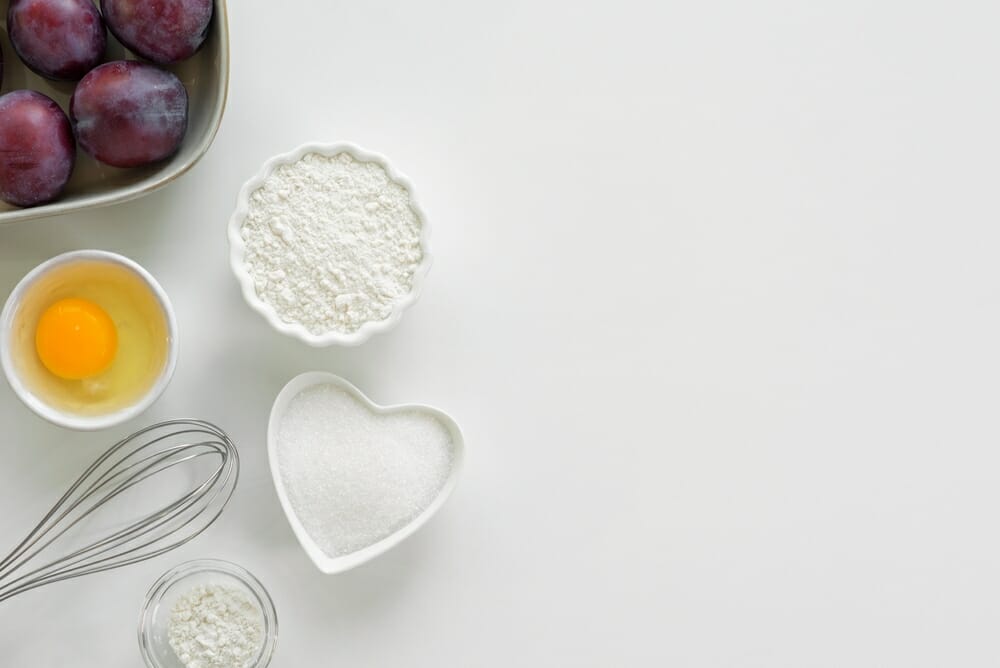
Ingredients
The most important element of a gravity-defying cake is what you choose to place above it, so the cake itself can be anything you prefer! Angel Food Cake, Red Velvet Cake, Sponge Cake – whatever you or your recipients respond best to.
For the purpose of this article, we’re going to choose a classic vanilla sponge recipe because you simply can’t go wrong with one of those! To get started, you’ll need the following ingredients to make the cake:
- 250g salted, softened butter (for the cake mix)
- 300g salted or unsalted, softened butter (for the icing)
- 250g caster sugar
- 250g self-raising flour
- 100g full-fat Greek yoghurt
- 600g sifted icing sugar
- 85g plain flour
- Five large eggs
- One tsp vanilla paste
- ¼ tsp salt
- Three tbsp semi-skimmed milk
- A dash of vanilla extract
How to make the cake
With all your ingredients laid out and ready to make magic, pop on your apron and play an awesome baking-inspired playlist to get you in the baking mood. Here’s all you need to do to get underway with phase one of your gravity-defying cake:
Step one: Preheat your oven on gas mark three (160°C / 140°C fan) and grease a round, deep tin before lining the base and sides with non-stick baking paper.
Step two: In a bowl, mix the butter, sugar, vanilla, and salt until it’s pale in colour and fluffy in consistency.
Step three: Pour the eggs in one at a time, ensuring you beat well in between each one.
Step four: When the mixture returns to a fluffy consistency (add one tbsp of plain flour if it still looks a tad wet), beat in the yoghurt. Combine the plain and self-raising flour and then fold that into the batter using a large metal spoon, followed by the milk.
Step five: Once the ingredients have been well mixed, spoon the batter into your baking tin and pop in the oven for one hour and 20 minutes, or until well risen and golden.
(Pro tip: If you’re unsure whether your cake has been fully baked, poke a skewer into the centre. If it comes out unmarked, it’s ready!)
Step six: To make the vanilla buttercream icing while your cake bakes, beat the sifted icing sugar with the butter and vanilla extract. Continue to do this until the consistency is smooth.
Step seven: Once the cake is out of the oven and completely cooled down, fill your icing into a piping bag, and then get as creative as you’d like! You could create shapes or letters, or simply smear across the top and spread using a palette knife.
Now to create the showstopper
Once the cake part is ready, you’re going to need the following tools and ingredients:
- Wooden skewer
- Plastic, bendy straw
- 50g melted milk chocolate
- Large packet of your chosen sweets (M&M’s, Skittles, Smarties, and Haribo’s all work exceptionally well here!)
Step one: Push your wooden skewer down into the middle of your cake before pushing your straw over the top of your skewer. This will help secure it.
Step two: To decorate, brush a small amount of melted chocolate onto each of your sweets and then stick them to the straw, starting from the base up.
Step three: Continue to add the sweets one by one so that the entire straw is covered right away around until the part that bends.
Step four: Use the sweets to decorate the rest of the cake, sprinkling them over the top and then down the sides to create a cascading effect.
Step five: Attach an empty sweet bag (this could be the branded bag your sweets came in or a cute striped paper bag) to the bent part of the straw and add sticky tape to keep it in place.
Step six: Serve and watch your guests’ faces light up!
Gravity? What gravity?
And there you have it, an exceptional gravity-defying cake that will surely delight your children, party guests, or friends. Take your time with each step, and remember that practice makes perfect. Before you slice the cake and serve, take plenty of pictures of your creation and then remove the skewer and straw. Enjoy!